My UX Sketch Kit and Why You Need One Too
If you’re like me, you depend on creating high quality sketches for every UX design project. A “pen before pixel” philosophy demands that you have a handy sketch kit with you at all times. With that in mind, in this post I’ll share my current set of daily UX sketching tools.
Why Sketch?
As discussed in my previous post, UX Sketching: Whiteboard 101, having the ability to clearly communicate your ideas is one of the most important skills you can develop as a UX designer. It’s this ability that allows you to “think” on paper, come up with lots of ideas quickly and refine your best ideas even more quickly. It’s also an excellent way to effectively collaborate with clients and team members from the start of any design project. That’s why it’s great to always keep a UX sketch kit in your bag.
UI Stencils Case
Since I do a lot of remote work either in co-working spaces, at home or the local cafe, I like to have everything with me. The UI Stencils Case keeps all my pens, pencils and stencils well organized in my laptop bag or purse, ready to go at a moment’s notice.
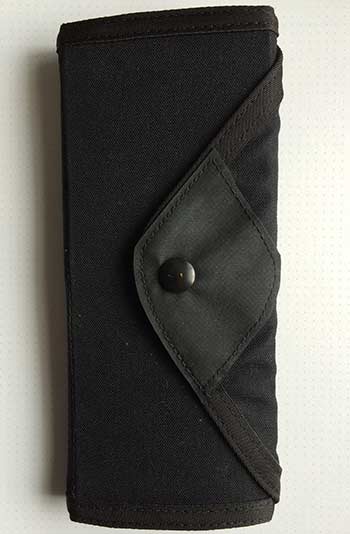
Made of rip-stop nylon with a single snap closure, it folds up a little bit bigger than my wallet, and about twice the size of a man’s wallet. I also like that it’s fairly unobtrusive on site at client meetings. The case sells online for USD $35.00. I don’t make any affiliate commission for promoting UI Stencils – they’re just a great company making great products. You can order it here.
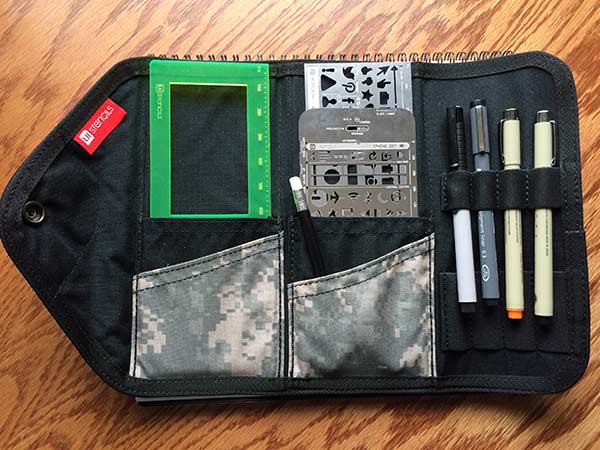
Inside The Case
As you can see in the picture of the open sketch kit above, there aren’t any Sharpies or Copic Markers in there. These are the workhorses for lots of other UX designers, but not me. I’ve tried them before and I’m just not a fan. They’re expensive and bleed through every piece of paper I’ve ever used, plus they are not friendly to my sketchbooks.
My sketching supplies are pretty simple and include the following:
Pigma Micron Graphic 1 – I like to do initial brainstorming with this pen, since it’s similar to a Sharpie, but doesn’t bleed through my paper. Using a big felt-tip pen forces me to keep the big picture in mind before diving into the details.
Pitt Cool Grey Brush Pen – I’ll use this instead of a Copic Grey Marker for outlining light shadows and separating out different screen elements. While it doesn’t blend as beautifully as a Copic, it doesn’t bleed through the paper or give off fumes.
Zebra 7mm Mechanical Pencil – Once my initial brainstorming is done, clients will often request a more refined sketch. I’ll start these off in pencil since I can easily erase any mistakes before going over everything in ink.
Black Staedtler .03 Pigment Liner – These pens seem to last a lot longer than Microns of the same size and give sketches a very clearly defined line. I use these to go over the initial pencil work.
Orange Pigma Micron 05 Pen – I like to write annotations on my final sketches with a bright orange pen so they’re easy to read. I learned this trick from a 2013 UIE sketching webinar presented by Nathan Curtis .
UI Stencils Quick Framer – I received this as a gift last year and use it all the time in my consulting work. It’s incredibly useful for banging out quick sketches for both mobile apps and websites.
Other Miscellaneous UI Stencils – I don’t use these as often as I thought I would, but both the website and iOS stencils are handy for clearly depicting standard UI elements such as social media icons and form elements.
Daily Practice Makes A Difference
Whether I’m in the office or in the field, my UX Sketch kit is always with me. I usually pair it up with a Dot Grid Notebook or a Moleskine Large Sketchbook. The case is getting a little beat up on the snap closure, but so far it’s holding up pretty well. And of course the pens, pencils and notebooks need to be replenished every other month or so depending on how much they get used.
If you want to learn more about sketching for UX, be sure to check out a course I recently took that helped me improve my UI sketching skills quickly.
Conclusion
Having a go-to UX sketch kit has really helped my workflow and creativity over the last year. I highly recommend it. What about you? What are your everyday sketching tools for UX design work? Please leave your thoughts in the comments. And as always, thanks for reading!
Get my UX Sketching Cheat Sheet.
Subscribe to download a handy cheat sheet you can use for your next UX sketching session.