Latest Articles from the UX Design and Careers Blog
-

6 Steps To Kickstart Your UX Design Career
Read more: 6 Steps To Kickstart Your UX Design CareerThere’s a lot to be said for following a digital UX designer career path. In most job markets, UX design for websites is a high-demand, well-paid job that delivers impressive rates of job satisfaction among UX designers.
-
How To Pivot To A UX Design Career From Marketing
Read more: How To Pivot To A UX Design Career From MarketingThe demand for UX designers has risen recently, prompting many in complementary career fields like marketing to wonder, “Is a career in UX design for me?” UX and UI designers (user experience and user interface designers) work to create an inclusive, immersive experience for visitors to a brand’s website or app. While UX and UI…
-
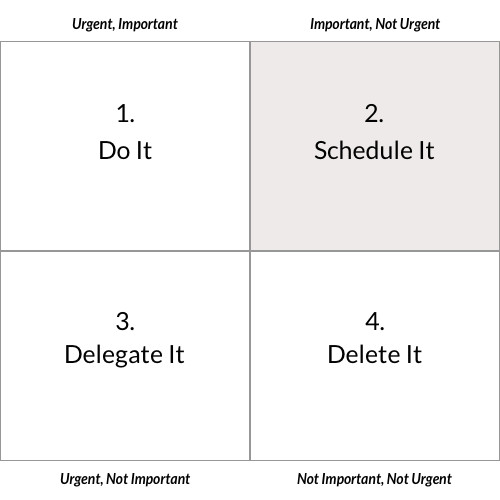
Important, Not Urgent
Read more: Important, Not UrgentDo you ever feel like you just can’t get to the stuff you really want to do? You know, the things that will truly move the needle in your life and career? I’ve felt that way a lot, more than I care to admit. Urgent things will always come at us. They’re like a river….